On-Premise Installation
Introduction
This guide will walkthrough the user on how to setup Backstage in their own environment.
Prerequisites
- You will receive the Setup package in zip file, which contains:
- “backstage” – the “Admin Portal” application folder
- “ess” – the “ESS Portal” application folder
- “setup” – misc components to be installed on the Web server
- A bak file – the database for initial setup
- MSSQL server (including Management Studio) is already setup and the credential is ready
Step 1 – installing software components
- 1-1: From “setup” folder
- Run “CRRedist2008_x86.exe” to install Crystal Report library for pdf generation
- Install “ARIALUNI.TTF” which is Unicode version of Arial for pdf generation
Step 2 – configuring the Web Server (IIS)
-
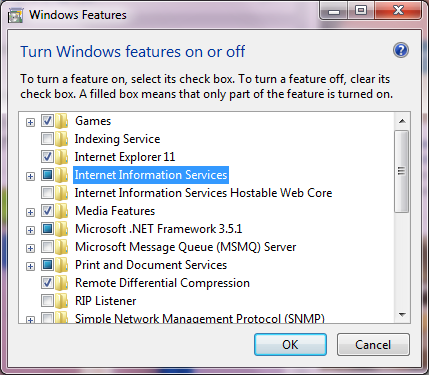
2-1: Go to “Add or remove programs” in the Control Panel, and click “Turn Windows features on or off” on the left hand side.

-
2-2: Find Internet Information Services and check the box first. And there is one more feature to add on, so expand the tree.
-
2-3: Go to Application Development Features, and select ASP.NET and press OK. It will take several minutes to turn on the features.

Step 3 – configuring the Application
3-1: System files
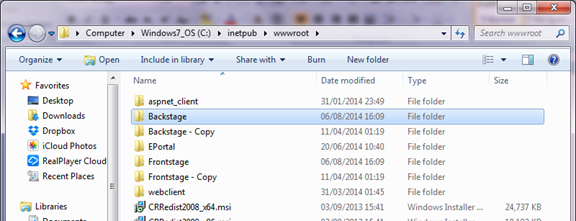
- 3-1-1: Copy both folders (“backstage” and “ess”) to C:\inetpub\wwwroot. Make sure all the folders and files are not Read Only. If possible, grant the Full Control right to IIS User account or other account of chosen.
- 3-1-2: Inside each folder, there is a file called connectionStrings.config. Open it with Notepad and enter the SQL Server Data Source (SQL Server Hostname), Initial Catalog (Database Name), User ID (SQL Login Account Name) and Password (SQL Account User's Password.

- 3-1-4: Inside each folder, there is a file called smtp.config. Open it with Notepad and enter the host (SMTP Server Hostname), port (SMTP Server Port), userName (Mailbox Account User Name) and password (Mailbox Account User Password)

- 3-1-5: For the web.config file of ESS, you will need to look for “backstageUploadUrl”, “backstageUploadPath” and “backstageReportPath” and insert to correct value related to your folder path and URL.
3-2: Database
- 3-2-1: Go to SQL Server Management Studio, and connect as “sa”.

- 3-2-2: Right click on Databases and find Restore Database.

- 3-2-3: Select “From device”.
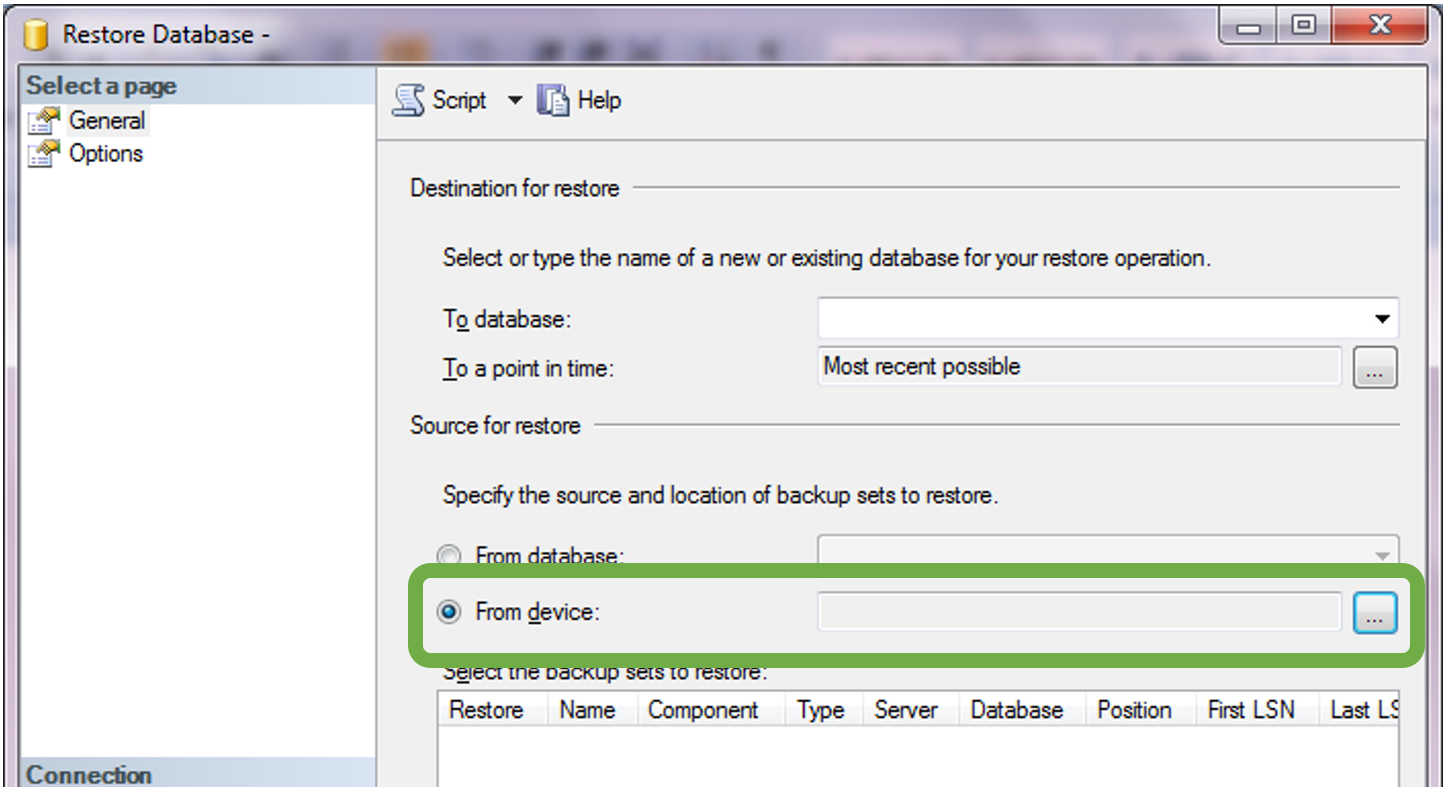
- 3-2-4: Then click “Add”, and locate the database backup.

- 3-2-5: Type in or select “To database”, and remember to check the restore box. Then click OK. The restoration of the database should be done.

3-3: Internet Information Services (IIS)
-
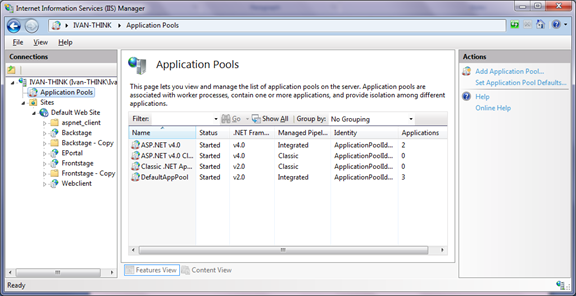
3-3-1: Go to the Internet Information Services (IIS) Manager, and find Application Pools.
-
3-3-2: Right click on the DefaultAppPool and select Advanced Settings.

-
3-3-3: Make sure
- .NET Framework Version is 0
- Enable 32-Bit Applications is True
- Managed Pipeline Mode is Integrated
-
3-3-4: Then go to Default Web Site and expand the tree.
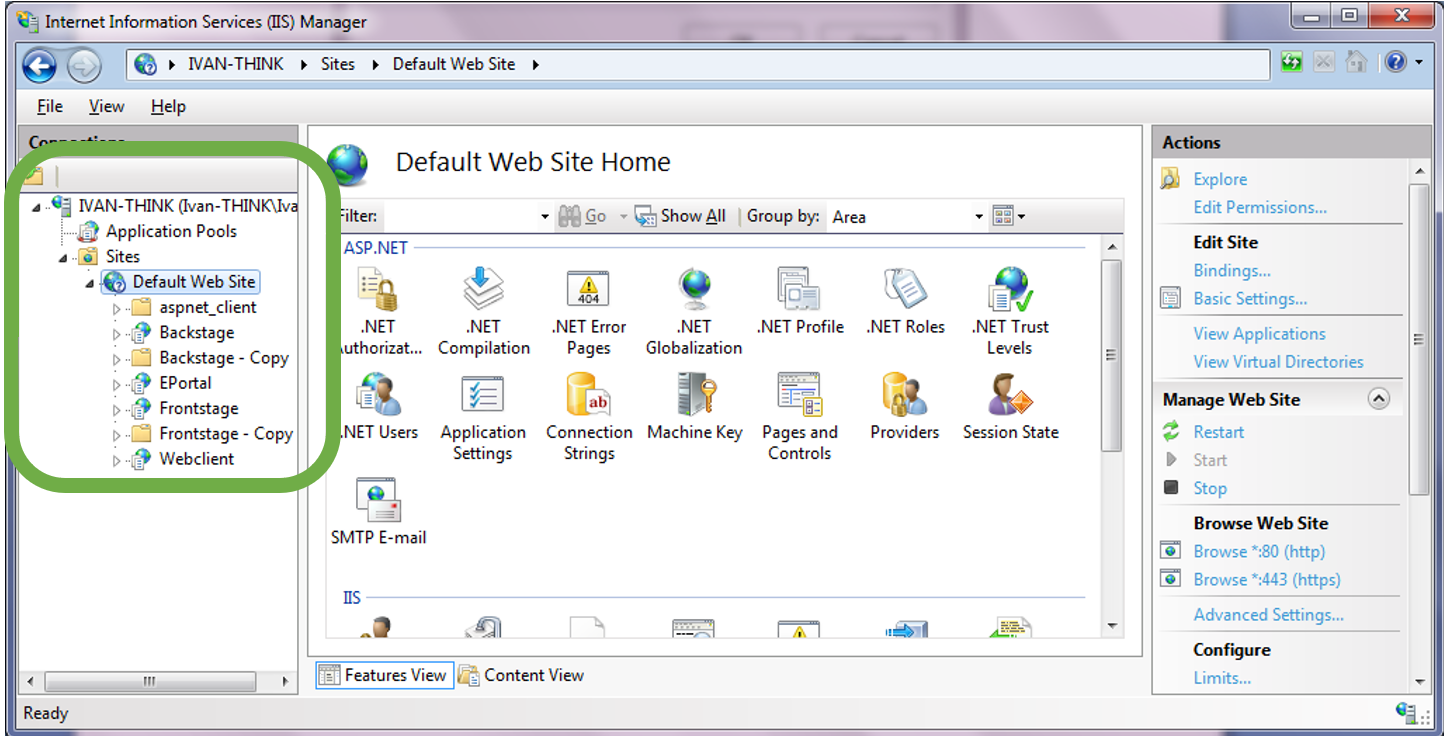
-
3-3-5: Right click on the Backstage folder and click Convert to Applications.
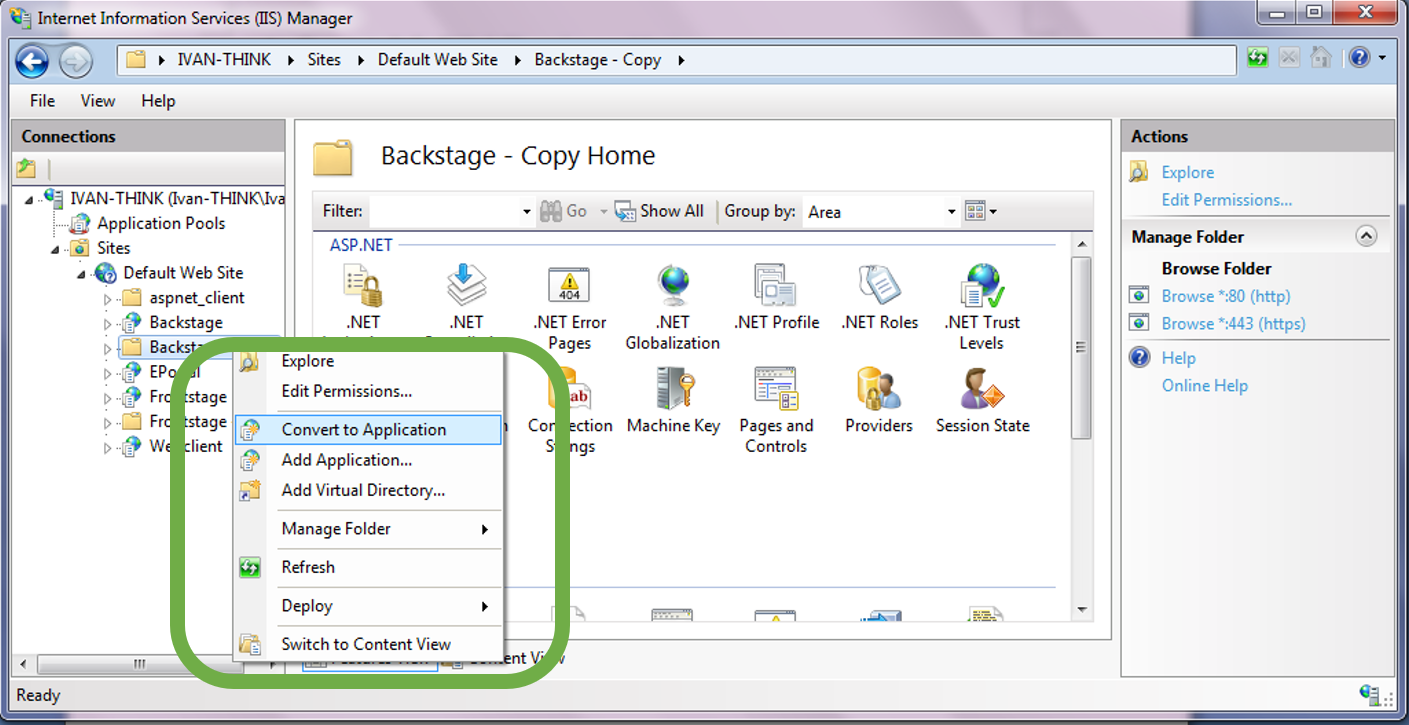
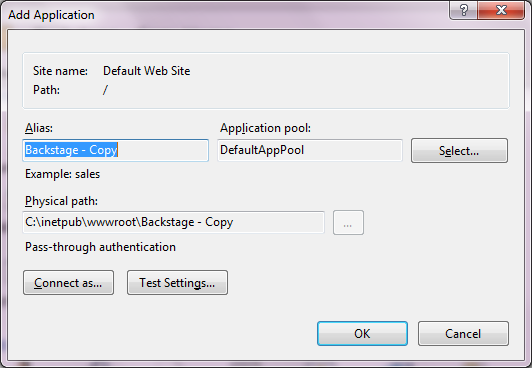
-
3-3-6: And just click OK.
-
Repeat Step 3-3-5 and 3-3-6 for the ESS folder as well.
Step 4 – Testing
- 4-1: Open a browser in the server (preferably Google Chrome).
- 4-2: Try go to http://localhost/backstage and http://localhost/ess
- 4-3: If it works, try http://(IP or machine name)/backstage and http://(IP or machine name)/ess on the other computers.